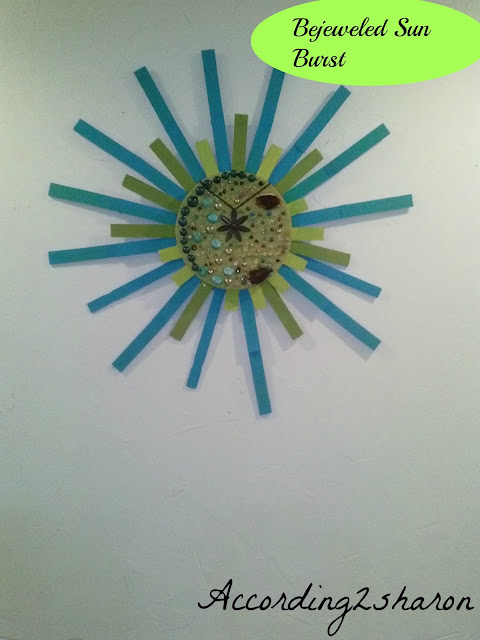
Lets take a look at how this one turned out:
I used some old jewelry that I wasn't going to wear anymore, But didn't want to part with just yet.
(I just love my jewelry even if I'm not wearing it) alone with some random beads I had from my jewelry making.
What I like most about the sun burst in general is how much space it takes up,(you can make it as large or as small and you choose) I like it BIG! It also comes in handy when you have a fairly large wall you want to cover.
Here's how I made this bedazzled beauty!
SUPER EASY INSTRUCTIONS:
1. I Gathered all the things I thought I would need. Of course along the way I changed some things out. (You know how projects sometimes take a turn!!!!!)
2. I then cut out a circle in the cardboard to use as the back of my sun burst and the part I would attach the shims too to create the sun burst. I then gathered my shims into piles according to length.
3. (side note) I attached two shims together to get longer lengths (used a glue gun of course)
Now its time to paint my shims.
4. Then I began attaching the shims to the cardboard: I filled in the spaces until I had a complete circle with my desired lengths using the longest first then the next length then I attached the shortest last.
5. I used a lid from one of those plain boxes that I purchased from ACmoore
(like the ones I decorated for storage in my craft room) I have so many it crazy! I just used one and covered it with fabric first. Then I began embellishing it with Jewels.
Once I had it like I wanted, I then hot glued the whole thing right on top of the shims let dry and placed on the wall in my up and coming dining room. (stay tuned for that also)
It was simple, easy, and free because I had everything already! (Now I cant
Thanks for stopping by as always, Feel free to look around the blog at older post if you haven't already and please come again soon.
Yours Truly,
Sharon
I'm linking up at:
http://www.savvysouthernstyle.net/















3 comments:
To leave a comment click the (links to this post on the lower right side under this post!!! THANKS :)
looks great Sharon! I love the blue & green :)
Buy lisdexamfetamine online in out store and have vyvanse coupon. take this prescription with or without nourishment as coordinated by your primary care physician for the most part once day by day toword the beginning of the day .try not to take this drugs toword the evening or night since it might raise you to have ruckus resting.purchase tvyvanse online without solution.You can can READ MORE about having a vyvance coupon
Post a Comment